Hive实验一:Hive安装部署及常用命令
Hive安装部署及常用命令
1 实验准备
1.1 启动Hadoop集群
首先按照顺序启动四个Docker容器
docker start master
docker start slave1
docker start slave2
docker start slave3
接着使用以下命令,进入到master环境内:
1
docker exec -it --privileged master /bin/bash
然后在master容器内启动Hadoop服务
1
2
3
start-dfs.sh
start-yarn.sh
mr-jobhistory-daemon.sh start historyserver
1.2 资源文件夹
资源文件夹位于/cgsrc,该文件夹存放了所有实验中需要用到的安装包。
文件夹中的内容是只读的,需要使用时请挂载到docker容器上。
在《hadoop安装部署实验》中,我们将该资源文件夹挂载到了每个docker容器的/cgsrc目录上
1.3 工作目录
本实验的工作目录为~/course/hive/hive_op,在桌面右键打开新的终端并使用以下命令创建和初始化工作目录:
1
2
mkdir -p ~/course/hive/hive_op
cd ~/course/hive/hive_op
1.4 准备数据
在桌面新打开的终端上,在本实验的工作目录~/course/hive/hive_op下创建student.txt文件,并写入如下数据:
1
2
3
4
5
6
7
8
9
10
11
12
13
14
15
1001,zhangsan,F,19,XG
1002,wangwu,F,20,XG
1003,liwei,M,19,WL
1004,liulan,F,20,WL
1005,zhaozilin,M,18,GS
1006,huangfei,M,21,XG
1007,wuwei,F,20,GS
1008,yangfang,M,17,XG
1009,zhanwang,F,19,GS
1010,wanggui,F,20,WL
1011,lilei,M,16,JC
1012,liulei,F,20,JC
1013,zhaolin,M,18,WL
1014,huanghu,M,21,JC
1015,weiwei,F,21,WLW
使用如下命令进入master节点:
1
docker exec -it --privileged master bash
在master节点上,使用如下命令将student.txt上传至hdfs的/hive/test目录下:
1
2
hadoop fs -mkdir -p /hive/test
hadoop fs -put /course/hive/hive_op/student.txt  /hive/test
2 安装Hive及配置环境
2.1 Hive安装
在桌面右键打开新的终端,执行如下命令进入master节点:
1
docker exec -it --privileged master /bin/bash
从 /cgsrc 中将 Hive 的安装文件复制到 /usr/loacl 目录下
1
cp /cgsrc/apache-hive-1.2.1-bin.tar.gz /usr/local/
执行如下命令解压:
1
2
3
cd /usr/local
tar -zxvf apache-hive-1.2.1-bin.tar.gz
rm -f apache-hive-1.2.1-bin.tar.gz
将解压得到的apache-hive-1.2.1-bin 文件夹重命名为 hive
1
mv apache-hive-1.2.1-bin/ hive
2.2 配置环境变量
使用vim编辑器打开 ~/.bashrc 文件:
1
vim ~/.bashrc
然后在该文件最末加入下面一行内容:
1
2
export HIVE_HOME=/usr/local/hive
export PATH=$PATH:$HIVE_HOME/bin
保存后执行如下命令使配置生效:
1
source ~/.bashrc
3 测试Hive
执行如下命令启动hive:
1
hive
若得到如下输出则安装成功:
至此Hive安装成功。
输入quit;可以退出Hive Console
4 启动Hive
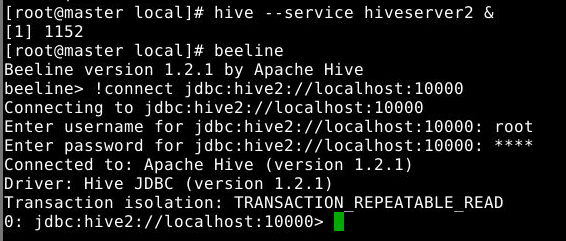
在master节点上输入如下命令启动 Hive服务 :
1
hive --service hiveserver2 &
接着在master节点上输入如下命令进入beeline终端并连接Hive:
1
2
beeline
!connect jdbc:hive2://localhost:10000
输入账号/密码:root/root
5 DDL命令
5.1 数据库操作
5.1.1 创建简单数据库
1
2
CREATE DATABASE testdb1;
CREATE DATABASE IF NOT EXISTS testdb2;
创建数据库的同时,设置数据库的存储路径:
1
CREATE DATABASE testdb3 LOCATION '/user/mydb';
创建数据库的同时,给数据库添加注释(描述信息保存在元数据表DBS的DESC项中):
1
CREATE DATABASE testdb4 COMMENT 'This is a test database4';
5.1.2 查看数据库
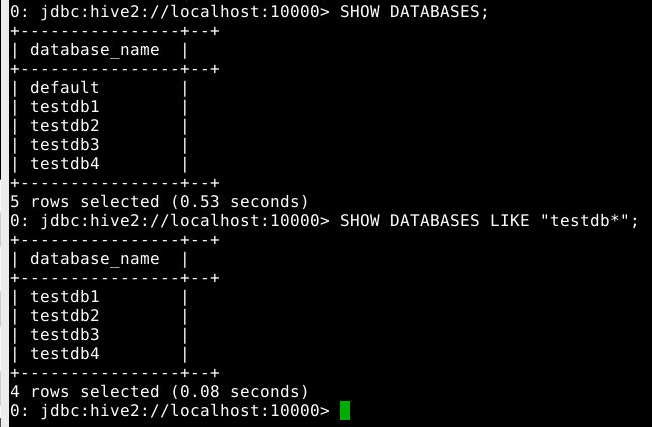
1
2
SHOW DATABASES;
SHOW DATABASES LIKE "testdb*";
执行效果如下:
查看当前数据库:
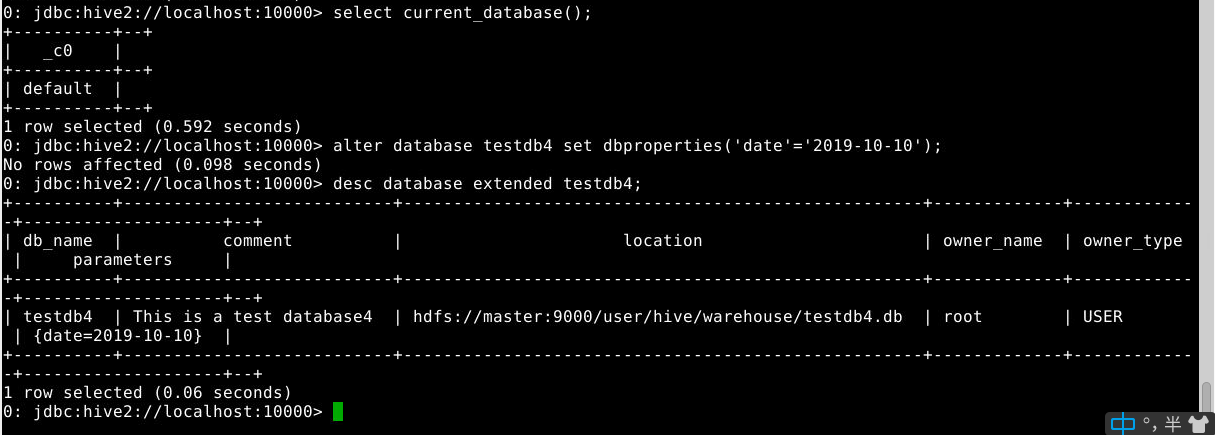
1
select current_database();
修改(数据库的元数据信息不可更改):
1
alter database testdb4 set dbproperties('date'='2019-10-10');
查看库的详细属性信息:
1
desc database extended testdb4;
5.1.3 删除数据库
1
drop database testdb1;
打开库,并建立数据表,删除数据库:
1
2
3
use testdb4;
create table mytable(ling string);
drop database testdb4;
查看出错原因,并执行下列删除操作
1
drop database testdb4 cascade;
5.2 数据表操作
5.2.1 建表操作
5.2.1.1 创建内部表
1
2
3
4
5
6
7
create table if not exists t1(
id int,
name string,
gender string,
age int,
depart string
);
5.2.1.2 创建外部表
1
2
3
4
5
6
7
create external table if not exists t2(
id int,
name string,
gender string,
age int,
depart string
);
5.2.1.3 创建分区表
1
2
3
4
5
6
create table if not exists t3(
id int,
name string,
gender string,
age int
)partitioned by (depart string);
5.2.1.4 创建桶表
1
2
3
4
5
6
7
create table if not exists t4(
id int,
name string,
gender string,
age int,
depart string
)clustered by (id) into 3 buckets;
5.2.2 修改表
5.2.2.1 重命名表
1
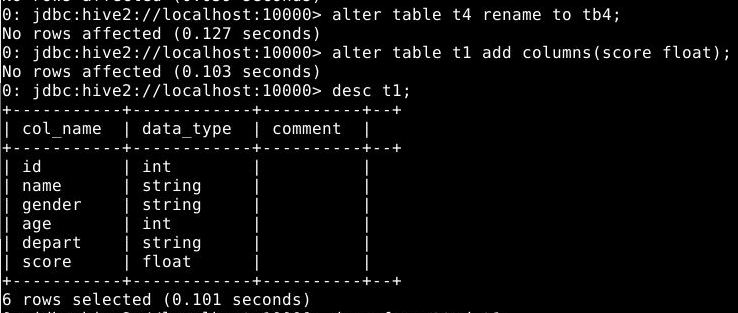
alter table t4 rename to tb4;
5.2.2.2 增加字段
为t1表增加字段score
1
alter table t1 add columns(score float);
查看增加字段后的表结构
1
desc t1;
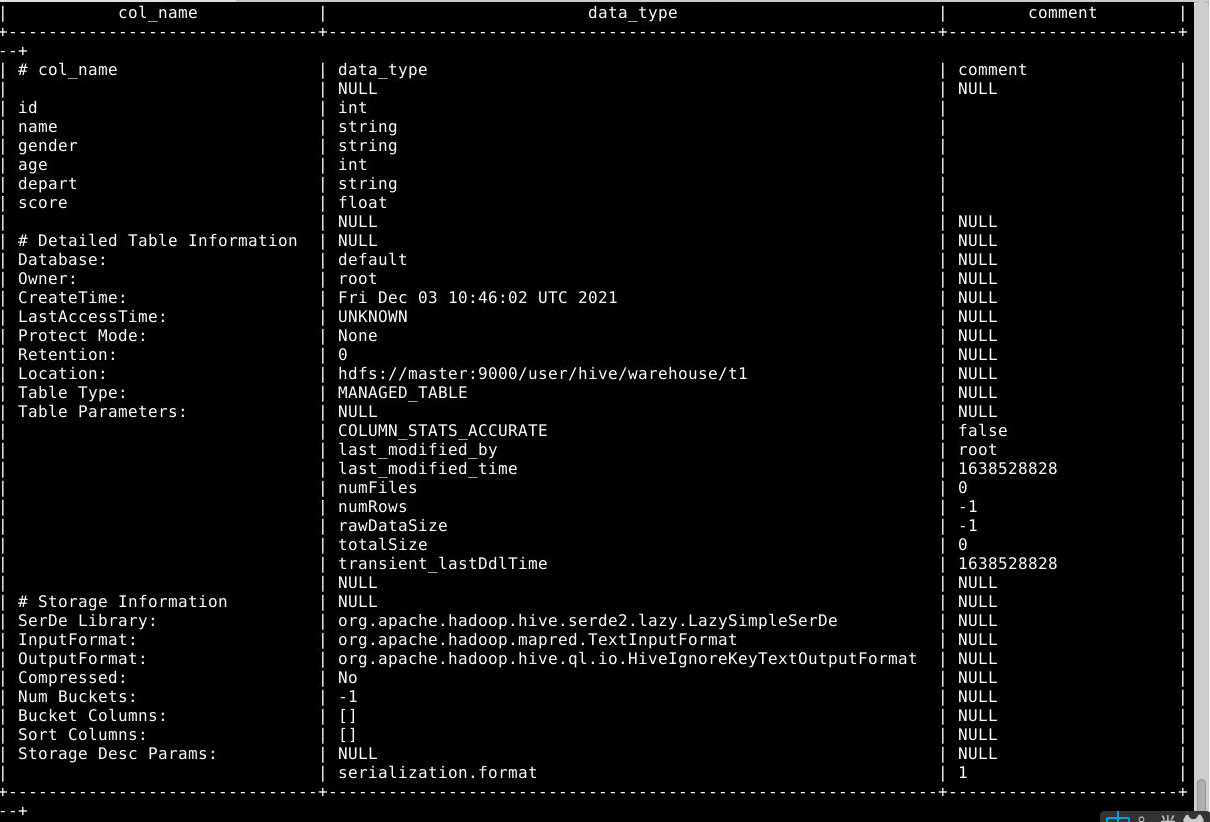
查看增加字段后表的详细信息
1
desc formatted t1;
5.2.2.3 修改字段:字段重命名、修改位置、类型或注释
将字段score的类型由float改为int
1
alter table t1 change score score int;
将字段score的名字改为grade类型改为double
1
alter table t1 change score grade double;
将字段grade类型改为int,位置调整到sex字段后
1
alter table t1 change grade grade int after gender;
注意:即使字段名或字段类型没有改变,也需要完全指定旧的字段名,并给出新的字段名及类型
5.2.2.4 删除或替换字段
1
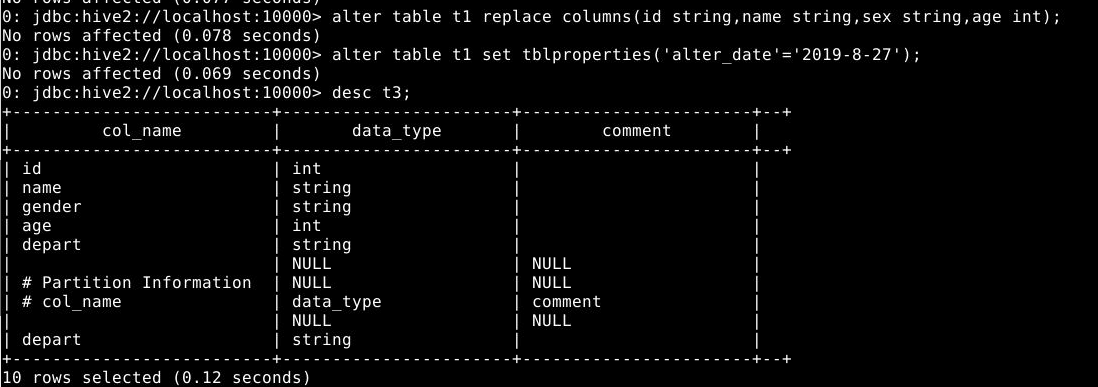
alter table t1 replace columns(id string,name string,sex string,age int);
移除之前所有字段并重新指定了新的字段
5.2.2.5 修改表的属性
1
alter table t1 set tblproperties('alter_date'='2019-8-27');
5.2.2.6 修改表分区信息
添加分区
1
alter table 分区表名 add if not exists partition(分区字段名=分区字段值);
添加分区的同时可以使用location指定路径。 为t3表增加一个depart为’XG’的分区,观察hdfs中目录结构的变化
1
alter table t3 add if not exists partition(depart='XG');
查看分区
1
show partitions t3;
重命名分区
1
ALTER TABLE t3 PARTITION (depart='XG') RENAME TO PARTITION (depart='WLW');
5.2.3 复制一个空表
1
create table empty like t1;
5.2.4 删除表
1
drop table if exists t1;
5.2.5.删除分区
1
2
alter table 分区表名 drop if exists partition(分区字段名=分区字段值);
alter table t3 drop partition(depart='WLW');
6 DML命令
数据导入有以下几种方法:
1.向表中装载数据(Load)
1
load data [local] inpath "path" [overwrite] into table tb_name [partition (partcol1=val1,…)];
load data:表示加载数据 local:表示从本地加载数据到 hive 表;否则从 HDFS 加载数据到 hive 表 inpath:表示加载数据的路径 overwrite:表示覆盖表中已有数据,否则表示追加 into table:表示加载到哪张表 tb_name:表示具体的表 partition:表示上传到指定分区
2.使用insert实现数据导入
3.查询语句中创建表并加载数据(As Select)
4.使用sqoop实现数据导入
6.1 内部表基本操作
6.1.1 创建数据库exercise
1
create database if not exists exercise;
6.1.2 打开数据库exercise,创建数据表stuInfo
1
2
3
4
5
6
7
8
use exercise;
create table if not exists stuinfo(
id int,
name string,
gender string,
age int,
depart string
)row format delimited fields terminated by ',' lines terminated by '\n' stored as textfile;
6.1.3 查看数据表中内容
1
select * from stuinfo;
6.1.4 向stuinfo中导入本地数据
1
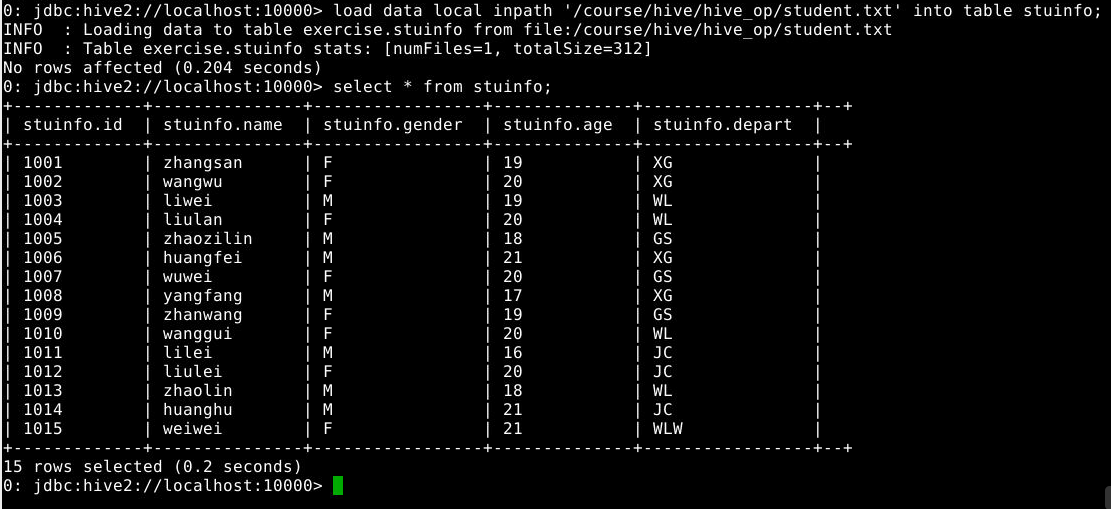
load data local inpath '/course/hive/hive_op/student.txt' into table stuinfo;
6.1.5 查看数据表中内容
1
select * from stuinfo;
6.1.6 创建数据表stuinfo1
1
create table stuinfo1 like stuinfo;
6.1.7 加载hdfs中数据到表中
1
load data inpath '/hive/test/student.txt' into table stuinfo1;
观察hdfs的/hive/test目录下的文件在加载前后的变化
6.1.8 查询语句中创建表并加载数据(as select)
1
create table stuinfo2 as select * from stuinfo1;
6.1.9 创建stuinfo3并通过insert插入数据
1
2
3
create table stuinfo3 like stuinfo;
insert into table stuinfo3 select * from stuinfo1;
select * from stuinfo3;
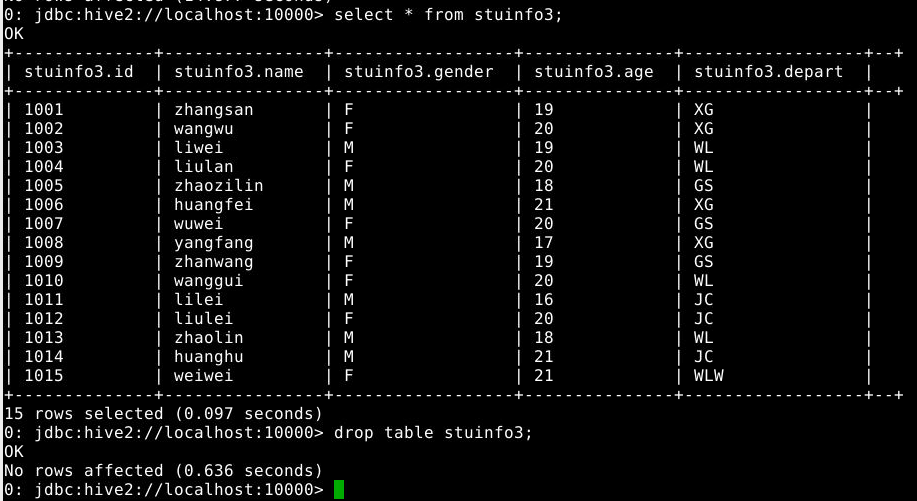
6.1.10 删除stuinfo3表,观察目录结构和文件的变化
1
drop table stuinfo3;
6.2 外部表的基本操作
6.2.1 创建外部表
1
create external table ext_stu1 like stuinfo location '/hive/test';
6.2.2 查看外部表中信息
1
select * from ext_stu1;
6.2.3 创建另一个外部表
1
create external table ext_stu like stuinfo;
6.2.4 导入数据
1
load data inpath '/hive/test/student.txt' into table ext_stu;
注意:执行命名前,先确保hdfs上/hive/test/student.txt文件存在,若不存在,先参考实验准备步骤将数据文件上传至hdfs。
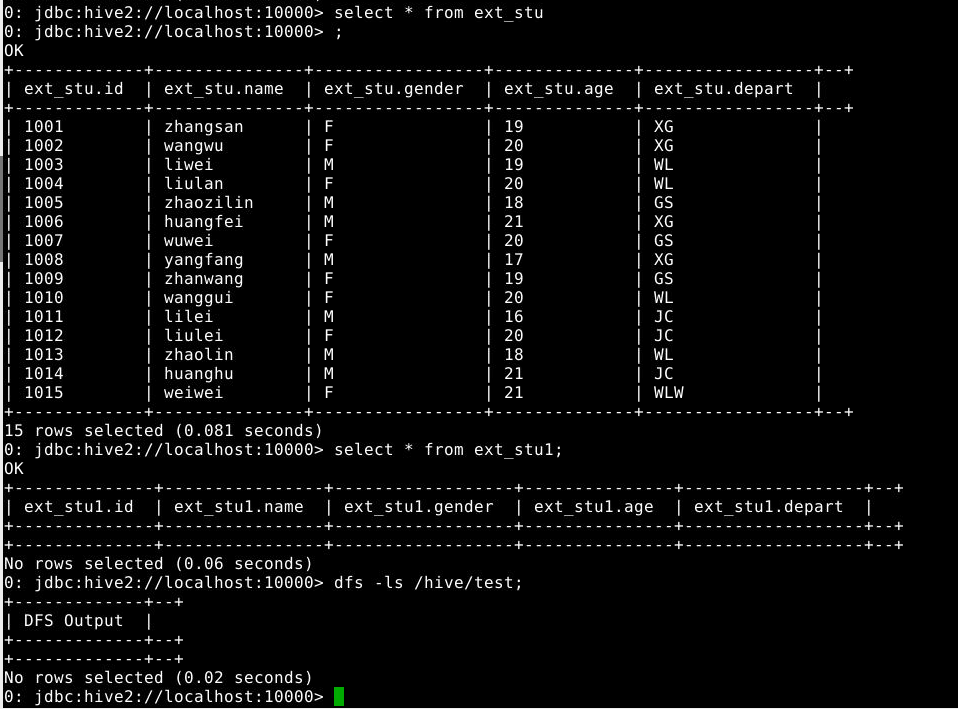
6.2.5 查看表中信息和hdfs中文件
1
2
3
select * from ext_stu;
select * from ext_stu1;
dfs -ls /hive/test;
6.2.6 删除数据表ext_stu和ext_stu1,并观察目录结构的变化
1
2
drop table ext_stu1;
drop table ext_stu;
6.3 分区表的基本操作
6.3.1 创建分区表
1
2
3
4
5
6
create table if not exists stu_ptn(
id int,
name string,
gender string,
age int
)partitioned by (depart string) row format delimited fields terminated by ',' lines terminated by '\n';
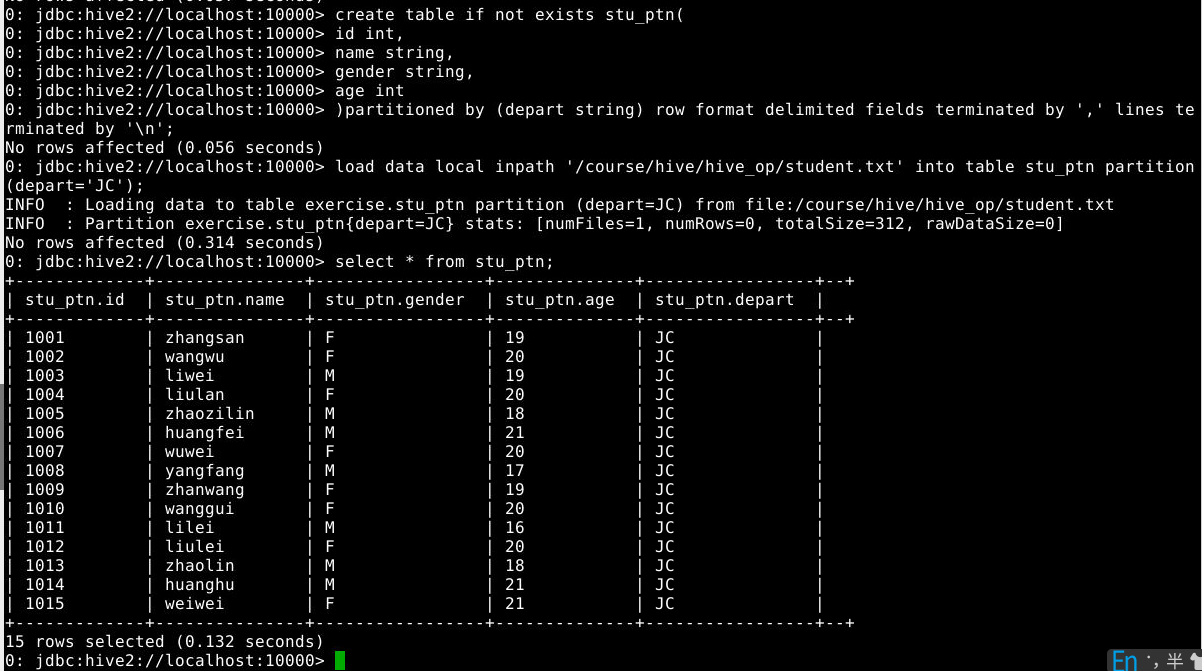
6.3.2 导入数据,并观察目录结果变化
1
2
load data local inpath '/course/hive/hive_op/student.txt' into table stu_ptn partition(depart='JC');
select * from stu_ptn;
分析结果产生的原因
6.3.3 删除分区(观察hfds目录/user/hive/warehouse/stu_ptn结构变化)
1
alter table stu_ptn drop partition(depart='JC');
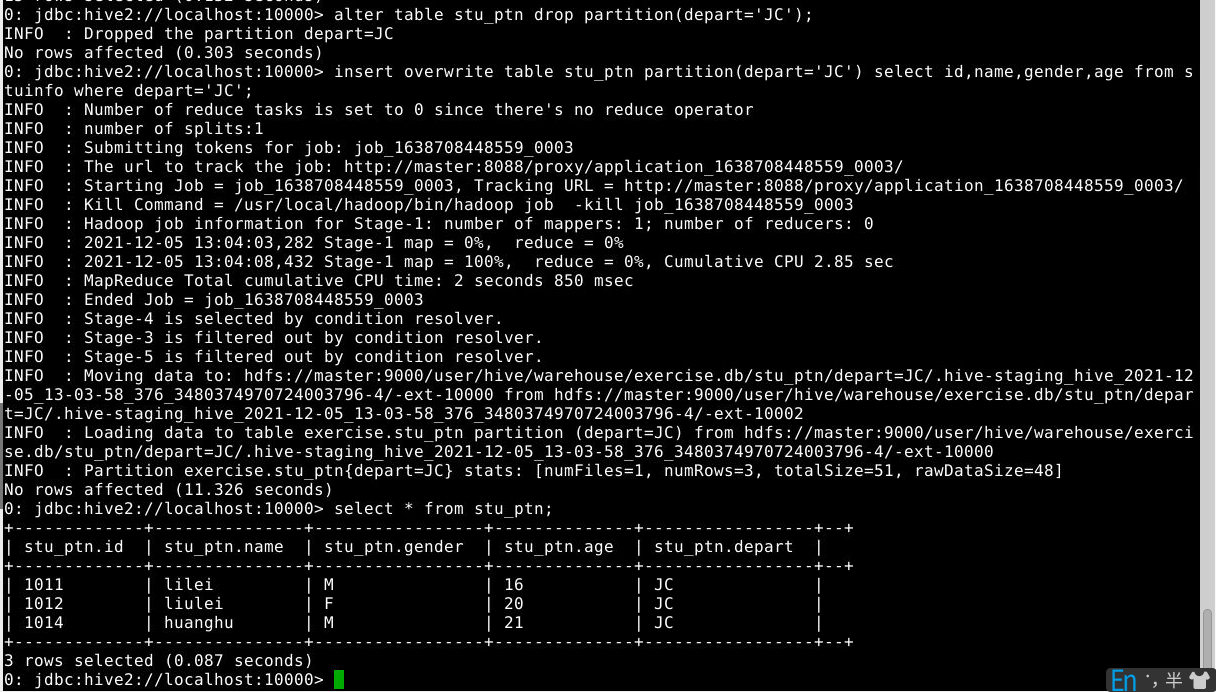
6.3.4 通过查询语句向表中插入数据
1
2
insert overwrite table stu_ptn partition(depart='JC') select id,name,gender,age from stuinfo where depart='JC';
select * from stu_ptn;
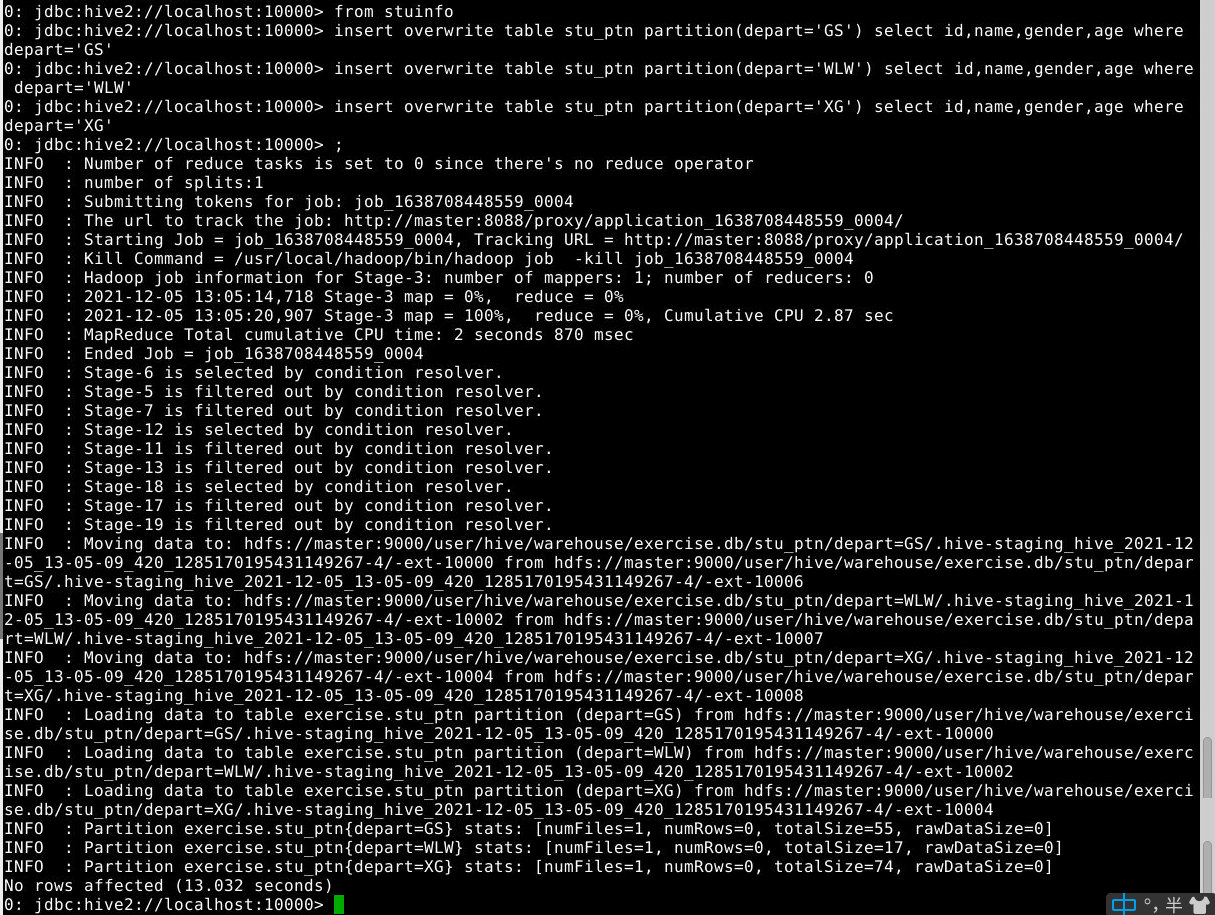
6.3.5 多插入模式
1
2
3
4
from stuinfo
insert overwrite table stu_ptn partition(depart='GS') select id,name,gender,age where depart='GS'
insert overwrite table stu_ptn partition(depart='WLW') select id,name,gender,age where depart='WLW'
insert overwrite table stu_ptn partition(depart='XG') select id,name,gender,age where depart='XG';
查看hdfs目录/user/hive/warehouse/stu_ptn结构变化 查询表中数据:select * from stu_ptn; 查看分区表对应的分区:show partitions stu_ptn; 添加分区:alter table stu_ptn add partition(depart='WL'); 上诉是静态分区。
6.3.6 动态分区(自动分区模式)
6.3.6.1 创建分区表(创建多个字段的分区表)
1
create table stu_ptn1(id int,name string,age int) partitioned by(depart string,gender string);
6.3.6.2 设置参数
1
2
set hive.exec.dynamic.partition.mode=nonstrict;
set hive.exec.dynamic.partition=true;
6.3.6.3 插入数据(观察目录结构变化)
1
insert overwrite table stu_ptn1 partition(depart,gender) select id,name,age,depart,gender from stuinfo;
6.3.6.4 说明
查询插入动态分区字段需要放在最后一个字段,否则会将最后一个字段默认为分区字段 多字段分区的时候,目录结构按照分区字段顺序进行划分 分区表使用的时候,分区字段和普通字段一样,只是在建表和添加数据的时候不一样
6.4 分桶表的基本操作
6.4.1 创建分桶表
1
2
3
4
5
6
7
create table if not exists stu_buk(
id int,
name string,
gender string,
age int,
depart string
)clustered by (age) into 3 buckets;
6.4.2 开启分桶功能
1
set hive.enforce.bucketing=true;
6.5 录入数据
1
2
3
4
insert into table stu_buk select id,name,gender,age,depart from stuinfo;
或
insert overwrite table stu_buk select * from stuinfo;
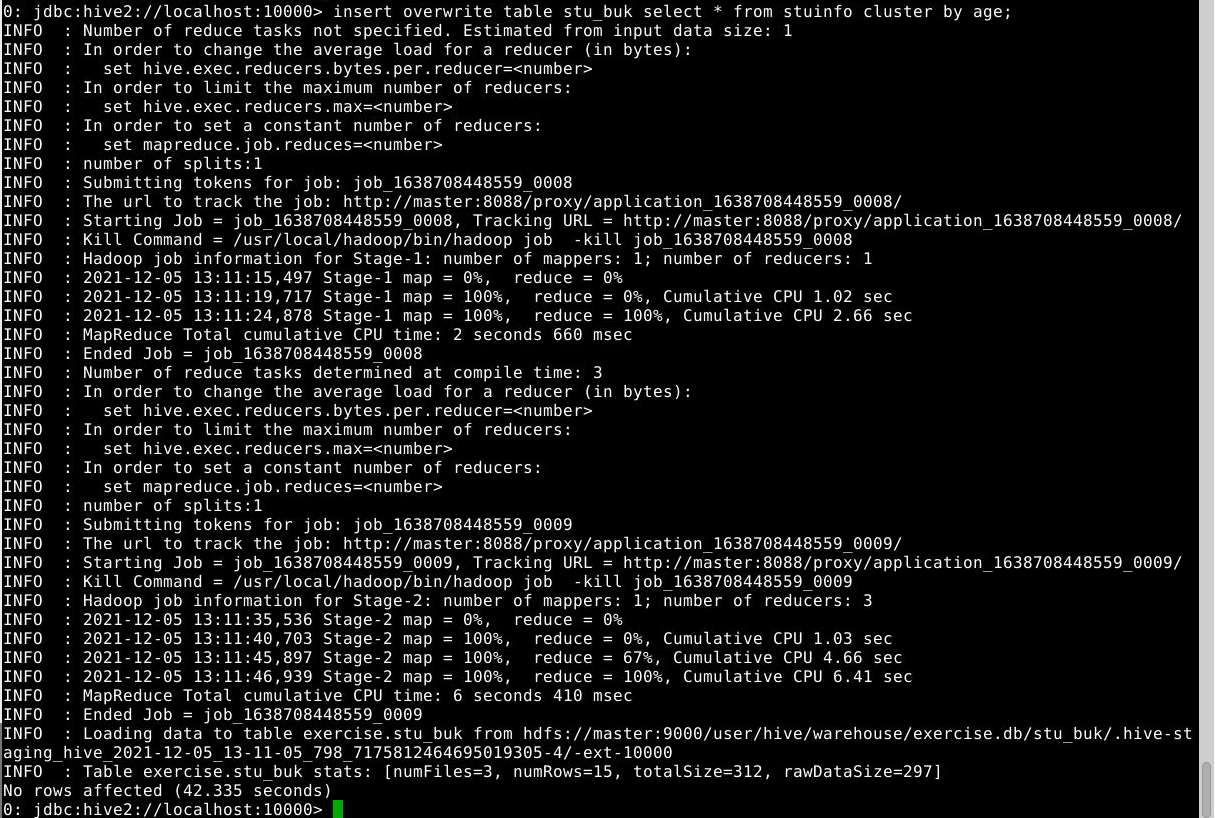
insert overwrite table stu_buk select * from stuinfo cluster by age;(没有开启分桶功能,但这是reducetask为3个即设置 mapreduce.job.reduces=3)
6.6 数据导出
6.6.1 将查询的结果导出到本地
6.6.1.1 单重导出
1
insert overwrite local directory '/course/hive/hive_op/hive-data/stuinfo' select * from stuinfo;
一个或多个文件会被写入到/course/hive/hive_op/hive-data/stuinfo目录下,具体个数取决于调用的reducer个数
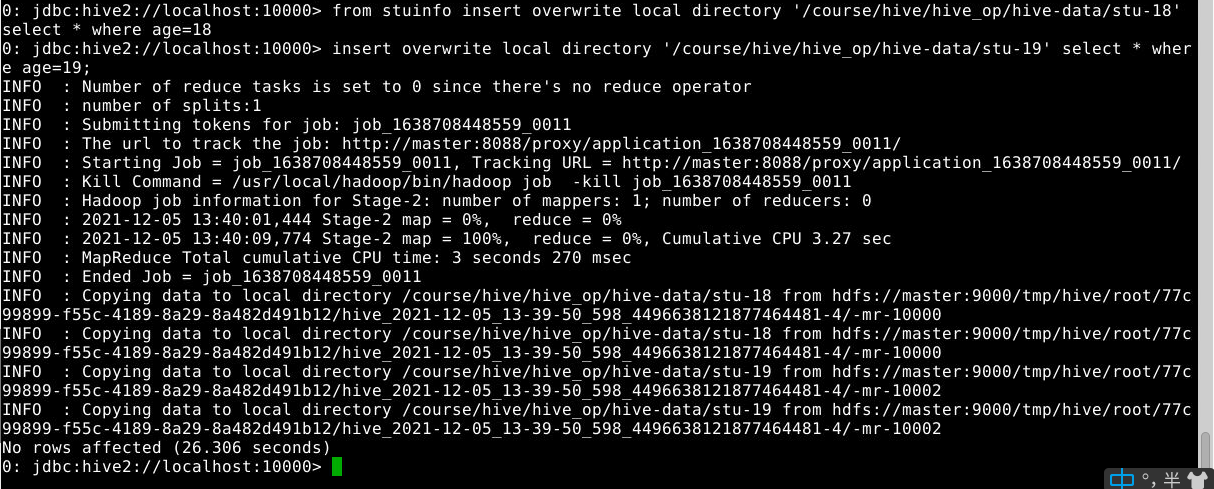
6.6.1.2 多重导出
1
2
from stuinfo insert overwrite local directory '/course/hive/hive_op/hive-data/stu-18' select * where age=18
insert overwrite local directory '/course/hive/hive_op/hive-data/stu-19' select * where age=19;
注意:数据写入到文件系统时进行文本序列化,且每列用^A来分隔,\n来换行。
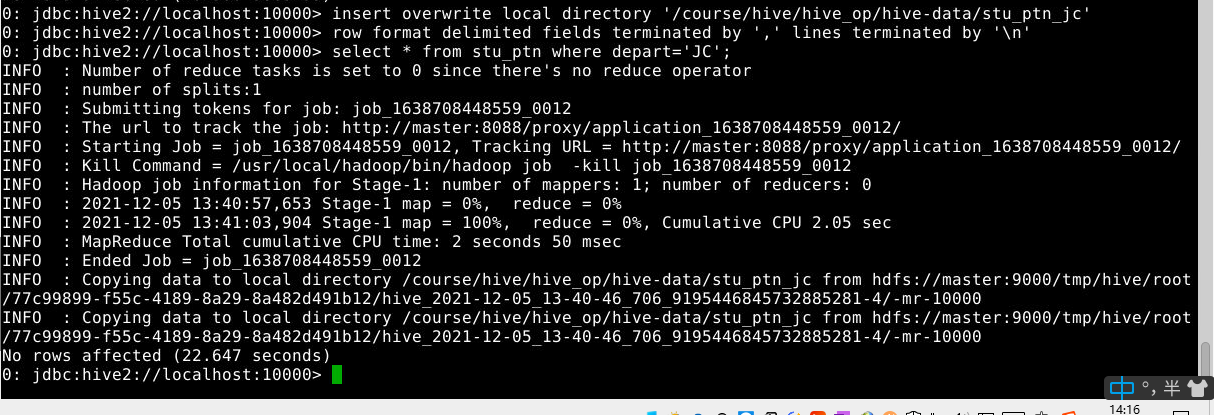
6.6.2 将查询的结果格式化导出到本地
1
2
3
insert overwrite local directory '/course/hive/hive_op/hive-data/stu_ptn_jc'
row format delimited fields terminated by ',' lines terminated by '\n'
select * from stu_ptn where depart='JC';
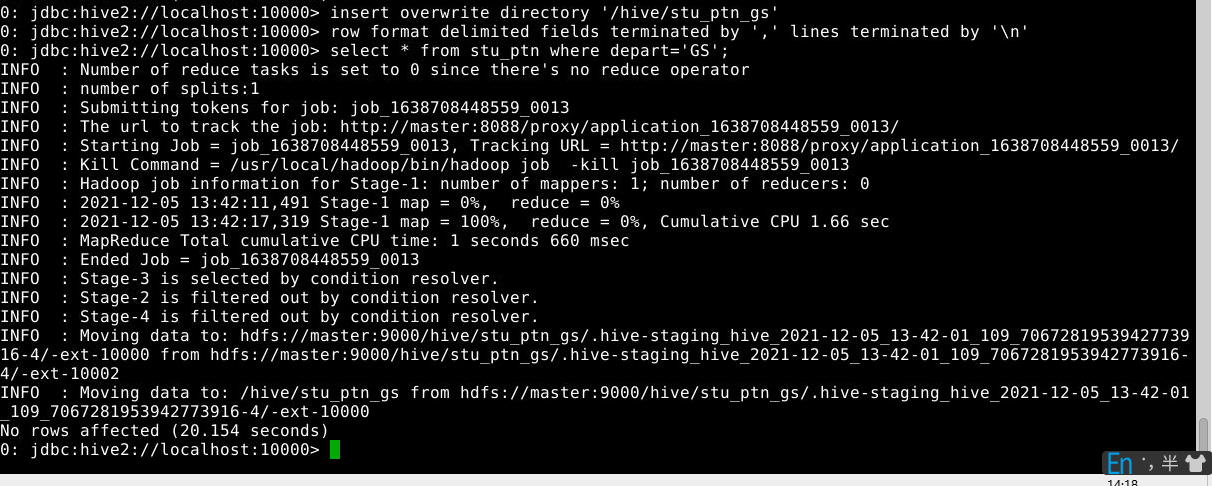
6.6.3 将查询的结果导出到 HDFS 上(没有 local)
1
2
3
insert overwrite directory '/hive/stu_ptn_gs'
row format delimited fields terminated by ',' lines terminated by '\n'
select * from stu_ptn where depart='GS';
6.6.4 Hadoop 命令导出到本地
在master节点上执行如下命令(不是在hive控制台执行该命令,导出前确保本地/course/hive/hive_op/hive-data/000000_0文件不存在)
1
hadoop fs -get /hive/stu_ptn_jc/000000_0 /course/hive/hive_op/hive-data/;
6.6.5 export导出到hdfs
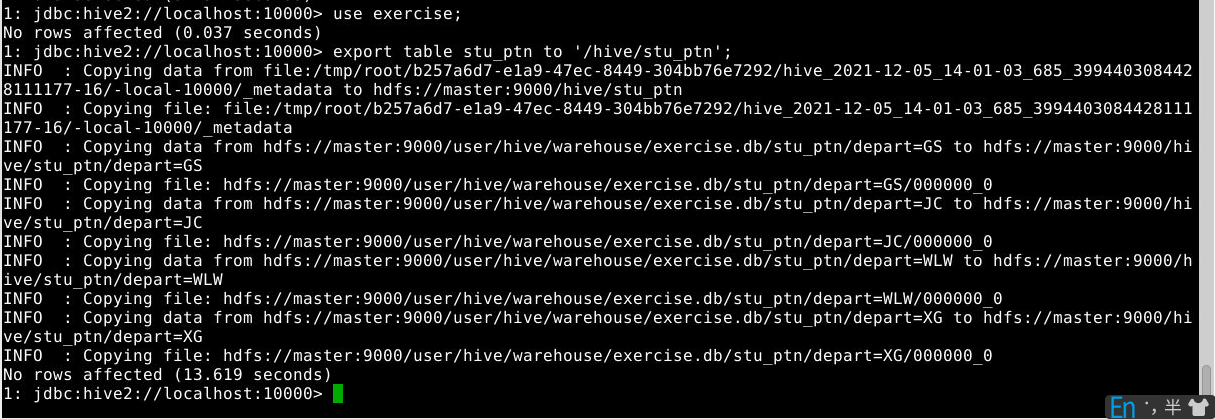
1
export table stu_ptn to '/hive/stu_ptn';
整个表的数据及元数据都导出到hdfs的/hive/stu_ptn/目录下。


